

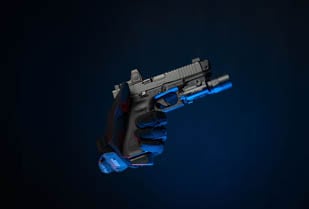


Why Carry With A Red Dot?
The Classic Firearms team has discussed the pros and cons of red dots at length in previous blogs, but the short answer is that electronic sights provide a clear and distinct sight picture for rapid target acquisition. In the context of concealed carry, this means that many self defenders can achieve tighter groups and faster follow-up shots with few (if any) real drawbacks.
In a defensive shooting, the first party to score an anatomically significant hit typically gains the advantage, so shooting as quickly and as accurately as you're able is the best way to stop the threat and escape from harm. This is why many shooters opt to carry a red dot on their EDC pistol.
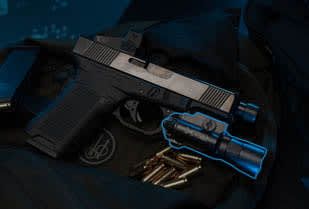
Swampfox Optics Sentinel II 1x20 Micro Green Dot 3 MOA Optic - Stealth Tritium Rear Sight - SNL2120-GMT
Red Dot Barriers To Entry
The advantages of electronic optics come at a cost, including financial expenditure and time spent training new concealed carry techniques. A quality red dot can cost $150 or more, whereas the process of zeroing a pistol optic and re-learning your draw stroke may require a bit of effort on your part.
Quick Tips For Transitioning To Red Dots
Once you have selected and installed your carry optic, the next step is to sight it in at a distance of 7-10 yards (the average range for defensive encounters). Watch our video below for a step-by-step guide!
A red dot will also impact the way you train with your EDC during dry fire practice, as well as at the range. Anecdotally, we've known many shooters to struggle with finding the dot and manipulating the pistol during shooting drills. Overcoming these obstacles is fairly simple with proper technique and repetition.
Finding The Dot
For the average person, the biggest adjustment when switching to an RMR is re-learning efficient target acquisition. This is challenging because red dots are inherently different from three-dot sighting systems in that there is only one focal point (iron sights have two) mounted at the rear of the pistol. Rather than centering the front sight post between the rear sights, shooters must align their eyes with the laser reticle to prevent the dot from shifting to the top, bottom, or sides of the glass.
The best way to achieve this is to modify your presentation when firing. From a low ready position, hold the pistol with both hands at chest level and push out while squaring your shoulders. When your arms are fully extended, your gun should be perpendicular to your torso and you should be able to find the dot quickly with minimal corrections. Repeat this movement until aiming is instinctive and does not require any adjustment before pulling the trigger.

Pistol Manipulation With A Red Dot
Even the smallest electronic optics have a larger footprint than traditional iron sights. Consequently, transitions and reload drills can sometimes be frustrated by the mere presence of a red dot because your hand is expecting to grip a smooth slide instead of an angular block of plastic and glass. Your first instinct might be to cup your support hand and pinch the slide serrations with your finger tips in a reverse-slingshot maneuver, but this is not as stable or efficient as an over-the-top slide rack.
Instead, try positioning your support hand just forward of the red dot using the same grip you would use to charge a pistol with standard iron sights. The meat of your index finger should contact the bottom of the optic frame without touching glass. From here, you can quickly and comfortably manipulate the slide during press checks and reloads. This placement may feel weird at first, but will become second nature with practice.
Get Out & Shoot With Your Carry Optic
The best advice we can give shooters who are transitioning to red dot carry is this: invest in a few boxes of target ammo and put some rounds downrange. For more red dot training tips, be sure to watch our video on target-focused vs. sight-focused shooting drills.