The video opens with Kyle and Jason introducing part two of their series on five common AR-15 mistakes, emphasizing that these are issues they have personally made or repeatedly seen in classes and professional settings. They stress that setup errors are not limited to hobbyists; law enforcement officers, SWAT team members, and military users also show up with poorly configured rifles, which is alarming given the life-and-death roles these guns fill. The hosts frame the episode as a practical, experience-based guide to avoiding configuration pitfalls that compromise performance under stress. They quickly transition into the first major topic: weapon light setup. Here they begin outlining how seemingly minor choices in light placement and activation can create serious tactical disadvantages, especially when shooters are moving fast, wearing gear, or working in low light where accidental light discharges can give away position or disrupt a shooting grip.
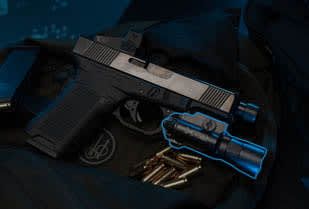
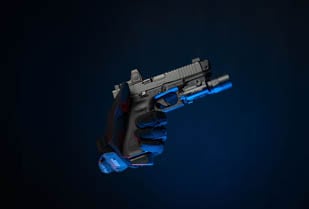
The first mistake centers on weapon light configuration, especially pressure pad placement. The hosts explain that many shooters mount a tape switch directly under where their support hand naturally grips the rail. Under stress, this leads to accidental or negligent light discharges as the shooter clamps down, unintentionally activating the light and broadcasting their position. They recommend offsetting the pressure pad, using ramps or guards, and aligning activation with natural thumb movement instead of raw grip pressure. Products like Unity mounts and newer, smaller SureFire activation buttons are highlighted as examples that require more deliberate input and better match human anatomy. The discussion emphasizes that the pad should not be a big, flat, always-on landmine under the palm. Instead, it should be placed so the thumb can intentionally roll or press onto it from a solid, repeatable shooting grip, reducing the chance of white light NDs during dynamic movement or awkward shooting positions.
The conversation shifts to how handguard length and light placement affect performance. Mounting a light too far back on the rail, especially with a suppressor installed, creates a large barrel or can shadow that blocks a significant portion of the beam, effectively wasting lumens and candela. They demonstrate how pushing the light head closer to the muzzle, sometimes with accessories like the T.REX Arms light bar, dramatically reduces this shadow and improves usable illumination downrange. However, they note the tradeoff: when running only a muzzle device, a very forward-mounted light sits close to the blast, accumulating carbon and requiring frequent cleaning, and it must be a durable, high-quality unit to survive. The hosts stress that regardless of exact position, the light must be easily activated from the shooter’s normal grip, whether via a pressure pad or a clicky tailcap. They close this section by underscoring that ergonomics and reliability matter more than copying trendy setups, then transition into the topic of witness marking hardware.
The next mistake involves neglecting witness marks on critical fasteners. The hosts explain witness marking as drawing a straight line across screws, bolts, and other components with a permanent marker or paint pen so any rotation becomes immediately visible. They demonstrate this on handguard screws and other attachment points, showing how a shifted line indicates movement from heat, recoil, or vibration. Before marking, they emphasize correctly torquing hardware to manufacturer specs and using appropriate threadlocker, such as blue or red Loctite, instead of overtightening or cross-threading, which they mock as obviously wrong. Witness marks are presented as a simple, low-cost insurance policy for maintaining reliability, catching loosening parts before they cause accuracy issues, malfunctions, or catastrophic failures. This practice is framed as especially important on hard-use rifles that see high round counts, suppressor use, or duty carry. With the concept established, they pivot to another overlooked area: magazine release design and how oversized buttons can cause problems.
Using a PWS Mark11 as an example, the hosts highlight the drawbacks of oversized, protruding magazine release buttons. On this rifle, the large, smooth button combined with relatively soft spring tension makes it easy to bump the release during dynamic movement, shooting around barricades, or when wearing plate carriers and other kit. The result can be unintentional magazine drops at the worst possible time. They contrast this with the standard AR-15/M4 mag catch, which sits more flush with the receiver, is partially protected by the receiver’s fence, and typically uses a stiffer spring, all of which reduce accidental activation. A CMMG Dissent with an oversized mag release is also examined; its much stiffer spring makes it less prone to unintended drops, but the hosts still consider it inferior to a standard catch for hard use. This section reinforces the idea that not every aftermarket or “enhanced” control is an upgrade, especially when reliability and retention under stress are the priorities.
The discussion broadens to the mistake of over-accessorizing rifles. The hosts joke about a caricature build loaded with a Holosun-style night vision unit, a gun camera, an EOTech with magnifier, flipped-up iron sights, and a nearly hidden light, all inspired more by video games and social media than real needs. They argue that every added accessory increases weight and complexity, which becomes painfully obvious once the rifle is carried for hours instead of just shot at a flat range. A missing sling is called out as a telltale sign that a rifle has not been used seriously, since a sling is essential for retention and comfort. They question the necessity of large lasers on guns that will never see night vision use, backup irons that are blocked by optics, gun cams used mainly for content creation, and bipods on SPR-style rifles that only ever shoot at 50 yards. The takeaway is to build rifles logically around mission, environment, and realistic use, not aesthetics.
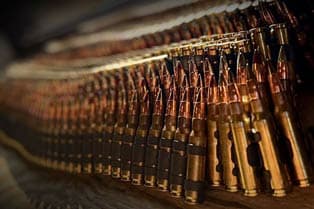
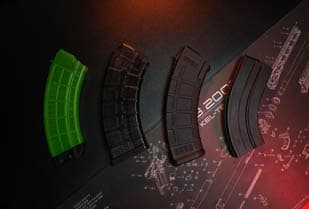
The final mistake focuses on magazine management and identification. The hosts describe using different magazine types, such as reserving Lancer mags exclusively for 300 Blackout while using PMAGs for 5.56, to create an immediate visual distinction between calibers. This helps prevent the dangerous scenario of loading a 300 Blackout round into a 5.56 rifle. They recount an example where a CZ Bren 2 survived such an event, but warn that most rifles could suffer catastrophic failure if this happens. Beyond caliber separation, they advocate clearly marking individual magazines so shooters can track which specific mag is causing malfunctions. Instead of having a pile of identical, unmarked PMAGs and guessing which one is bad, markings allow users to identify, repair, or discard problem magazines quickly. The video closes by inviting viewer feedback on their own mistakes and suggestions for a potential part three, including questionable setups like putting an LPVO on a 5-inch barrel with a bipod attached.