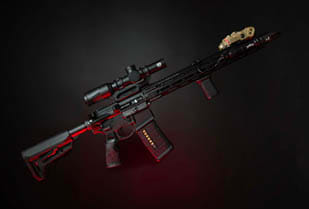
The discussion opens with a look at a 16 inch LWRC AR-15 and a basic question: what zero distance should be used? The hosts explain that many shooters buy a 16 inch AR-15 chambered in 5.56 and then struggle to choose a zero. Common options include 25, 36, 50, and 100 yard or meter zeros. They emphasize that the right choice depends on intended use, engagement distances, and shooter preference. Barrel length, twist rate, and bullet weight all influence how a chosen zero actually performs. For this breakdown, they focus on a typical 16 inch AR-15 with a 1:7 or 1:8 twist barrel firing 55 grain 5.56 ammunition, then compare how each zero behaves from close range out to a few hundred yards.
An illustration is used to explain line of sight, point of aim, and point of impact. The line of sight is a straight line from the optic to the target, while the bullet’s path arcs relative to that line. Using a 50 yard zero as the example, the bullet starts below the line of sight, typically about 1.5 to 2 inches low inside 50 yards. At 50 yards, point of aim and point of impact intersect. Beyond that, the bullet rises slightly above the line of sight, then drops back down to intersect again around 200 yards. This basic arc applies to any zero distance; only the exact intersection points and the amount of rise and drop change. Understanding this relationship is key to predicting where rounds will land at different ranges.
The 25 yard zero is described as usable but unforgiving if the shooter does not fully understand the trajectory. With a 25 yard zero, the muzzle is angled more sharply relative to the line of sight. After the bullet crosses the line of sight at 25 yards, it continues to rise, often resulting in impacts about 4 to 6 inches high between roughly 50 and 200 yards. This can cause significant vertical deviation if not accounted for. The 36 yard zero, and the closely related 36 meter zero, is highlighted as a common military choice, especially in close quarter battle contexts. Marines in particular have used a 36 yard doctrine for years. It keeps shifts small at close distances and carries reasonably well toward 300 yards, making it practical for general qualification and typical combat engagement ranges.
The hosts present the 50 yard zero as a highly versatile option for a 16 inch 5.56 AR-15 with 55 grain ammunition. With this setup, the bullet is about 2 inches low or less before 50 yards, intersects the line of sight at 50, then arcs slightly above before coming back down to intersect again around 200 yards. From muzzle distance out to roughly 250 yards, the deviation from the line of sight is generally within about 2 inches high or low. This allows a shooter to aim center mass at intermediate ranges, such as 125 yards, and expect hits within roughly an inch and a half of the point of aim if fundamentals are solid. Law enforcement agencies, at local, state, and federal levels, have commonly used a 50 yard zero because it works well for both close quarters and mid-range engagements.
The 100 yard zero is framed as familiar to hunters and long-range shooters. With this zero, point of aim and point of impact intersect at 100 yards, and the bullet then drops more rapidly beyond that distance. Inside 100 yards, impacts will be a bit low, requiring the shooter to hold slightly higher. It is not considered ideal for close quarters work compared to a 50 yard zero, but it is still workable and was historically used by law enforcement. One host notes that 100 yard or 100 meter zeros pair well with magnified optics such as LPVOs or MPVOs. A flatter trajectory around the zero distance simplifies holdovers and wind calls when using reticle subtensions, making it easier to do the necessary “math” for longer shots.
After establishing the baseline with a 16 inch barrel and 55 grain 5.56, the hosts explain how changing bullet weight or barrel length alters performance while keeping the same nominal zero. Using a 16 inch LWRC with a 50 yard zero and 77 grain OTM 5.56, the heavier bullet has a better ballistic coefficient but lower velocity, roughly in the 2,700 feet per second range depending on the load. As a result, at 200 yards the impact will be about an inch and a half lower than with 55 grain, because the slower round drops sooner. Shortening the barrel to around 11.5 or 12.5 inches with 55 grain ammunition preserves the 50 yard intersection point, but reduced velocity causes more drop at distance, approaching about 2 inches lower at 200 yards compared to the 16 inch configuration.
The conversation returns to the idea that mission dictates gear and zero choice. For most shooters using red dots on a 16 inch 5.56 AR-15, the 50 yard zero is favored as a general-purpose solution. However, one host describes a different approach when running multiple optics. On a rifle equipped with an LPVO, the magnified optic is zeroed at 100 yards or meters to support more precise, extended-range shooting and easier use of reticle holds. A secondary red dot mounted at the 12 o’clock position is then zeroed at 50 yards. This gives a quick reference for close or intermediate engagements out to roughly 200 meters while preserving the benefits of a 100 yard zero in the primary optic. The emphasis remains on selecting zeros that match realistic engagement zones and intended roles for the rifle.