The video opens by addressing a common question when mounting a new optic, especially a red dot or similar sight: what distance should be used to zero the gun. Popular choices like 25 yards, 36 yards, and 100 yards are introduced, with 100 yards highlighted as a default for many shooters because it is easy to visualize, roughly the length of a football field. Using a Daniel Defense M4V7 16-inch 5.56 carbine as the primary example, the discussion ties zero distance directly to the rifle’s intended role. Different applications are considered, including home defense, coyote hunting, and general defensive carbine work, along with concerns such as over-penetration in a home environment. The segment sets up the idea that there is no single perfect zero; instead, the best choice depends on how and where the rifle will actually be used, and what typical engagement distances are expected.
The next section explains how optic and barrel alignment, bullet trajectory, and crossover determine where rounds impact at different distances. The concept of the bullet’s arc crossing the line of sight twice is used to frame why certain zeros are popular. A 36-yard zero is highlighted, referencing Marine Corps boot camp training with iron sights, where a 36-yard point of aim/point of impact closely matches impact at 100 yards. This approach gives shooters a practical way to confirm a useful zero on shorter ranges while still being effective at more extended distances. The discussion contrasts this with a straightforward 100-yard zero that many shooters favor for simplicity. By comparing these options, the video shows how a 36-yard zero can provide similar benefits to a 100-yard zero while being easier to achieve on limited ranges, and how understanding trajectory helps predict holds beyond the initial zero distance.
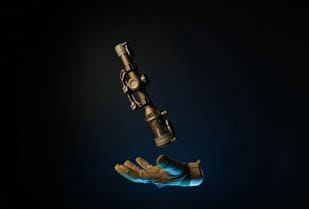
Attention then shifts to magnified optics and how they are typically zeroed. A Leupold scope on a Mk12-style rifle is used as an example, set up with a 100-yard zero and a bullet drop compensation reticle. The reticle provides mil-dot or hash references for 200, 300, 400, and 500 yards, plus a horizontal stadia line for 600 yards, allowing precise holds at distance. Leupold custom turrets are discussed, originally calibrated for 55-grain .223 ammunition, even though the rifle is often shot with 77-grain open tip match. The video notes that these different bullet weights and velocities create significant trajectory changes, so shooters must understand their specific load. With a solid 100-yard zero and correct dot or stadia selection, consistent hits out to 500 yards are described as very achievable. This section underscores that magnified optics often build in drop references, while red dots generally do not, making initial zero choice even more critical for non-magnified sights.
The final section focuses on red dot sights and practical zero choices, especially for carbines like a 300 Blackout home defense gun. Height over bore at very close distances is emphasized, explaining that within roughly 15 yards the shooter must aim slightly higher to compensate for the sight being above the barrel. The video argues that a 50-yard zero on a red dot offers an effective balance, working well for quick transitions between a red dot and a magnified optic when moving from close to more distant targets. A 50-yard zero is presented as the preferred choice, matching typical work and range setups between 50 and 100 yards. It is noted that this zero often yields a similar point of impact around 200–250 yards, extending practical accuracy, with the tradeoff of needing a small holdover at very close range. The segment closes by comparing 50-yard, 36-yard, and 100-yard zeros, stressing that the best option is ultimately personal preference and inviting viewers to share their own recommendations.










 Loading...