The video opens by clearly defining its purpose: to help anyone who owns or runs an AR-15 learn how to actually train with it. The instructors frame the content for a wide audience, from brand-new AR-15 owners to more experienced shooters and even law enforcement users. Instead of focusing on flashy gear or competition-only tricks, the emphasis is on practical, real-world skills that translate to better performance with a carbine. Viewers are told up front that the goal is to build a foundation of fundamentals and repeatable drills. The tone is direct and instructional, setting expectations that the session will cover rifle setup, basic mechanics, and live-fire exercises that can be replicated on any range. This introduction positions the rest of the video as a structured path to becoming more competent and confident with an AR-15, regardless of current skill level.
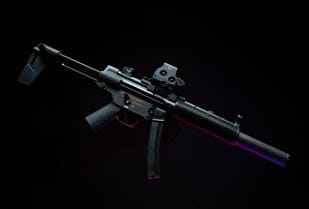
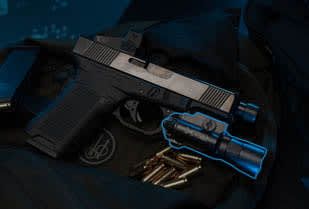
The instructors deliberately showcase a budget-friendly AR-15 to prove that effective training does not require a premium rifle. They run a Radical Firearms RF15 as the base gun, highlighting it as a realistic option for many shooters. On top of that rifle, they mount a North Tac Ronin red dot optic, explaining that a simple, reliable red dot is more than sufficient for the drills and distances being demonstrated. A Streamlight weapon light is attached to provide practical illumination capability without a high price tag. Up front, a Unity foregrip is used to help manage control and consistency in the support hand. A Magpul MS1 sling rounds out the setup, giving the shooter a stable way to carry and manage the rifle between drills. Throughout this section, the message is clear: thoughtful, functional accessories on a modest AR-15 can fully support serious training and skill development.
The video then explains one of the most important technical concepts for AR-15 shooters: height over bore. Using the Radical Firearms RF15 with the North Tac Ronin red dot, the instructors demonstrate the vertical distance between the optic’s line of sight and the actual bore line. They show that even with a practical 50-yard zero, shots at very close distances—around 7 to 10 yards—will impact several inches low relative to the dot. This offset is not a malfunction but a predictable mechanical reality of the AR-15 platform. By shooting at close-range targets and comparing point of aim to point of impact, they illustrate how a shooter must consciously hold slightly higher to get hits where intended, especially on smaller scoring zones or precision head shots. The segment stresses that understanding and compensating for height over bore is critical for defensive or practical carbine work at indoor or short-range distances.
With the rifle and zero established, the instructors move into ready-up drills, starting from either a low ready or high ready position. The core exercise is bringing the AR-15 up on target and firing two controlled rounds into the A-zone of a torso target. A performance benchmark is introduced: completing the ready-up and two-shot string in under 1.5 seconds. This time standard pushes shooters to blend speed with accountability, forcing efficient presentation of the rifle, rapid sight acquisition through the North Tac Ronin red dot, and clean trigger presses. The instructors emphasize consistent stock placement in the shoulder pocket, a solid cheek weld, and a firm but not exaggerated grip on the Unity foregrip. Repetition of this drill is presented as a way to build a reliable, automatic mount of the rifle, so that the dot appears naturally in the A-zone as the shooter drives the gun up from ready.
After establishing competence with two-shot A-zone ready-ups, the training progresses to more demanding shot placement. The instructors introduce head shots, requiring the shooter to account even more carefully for height over bore at close distances. They demonstrate how a center-of-face point of aim can result in low hits if the mechanical offset is ignored, and they coach holding slightly higher to land rounds in the intended head box. A Mozambique-style drill is then layered in: two rounds to the A-zone followed by a precise shot to the head. This sequence forces the shooter to transition quickly between larger and smaller scoring areas while maintaining control of recoil and sight picture. The drills reinforce target discrimination, shot accountability, and the importance of understanding where rounds will actually land relative to the red dot, especially when shifting from body to head under time pressure.
The instructors analyze the shot patterns produced during the ready-up, A-zone, and head-shot drills, paying particular attention to vertical stringing. They point out how consistent low impacts at close range often reflect uncorrected height-over-bore issues rather than poor marksmanship. By walking the viewer through the target, they show how to diagnose whether misses or marginal hits are caused by stance, grip, stock placement, or failure to compensate for offset. The segment emphasizes refining fundamentals: adjusting body position to better manage recoil, ensuring the stock is placed consistently in the same shoulder pocket, and maintaining a repeatable cheek weld so the red dot tracks predictably. The instructors stress that improvement comes from honest evaluation of hits and deliberate corrections, not from changing gear. This analytical approach teaches shooters to use their targets as feedback tools to tighten groups and improve overall performance with the AR-15.
Near the end of the video, the speaker directly addresses a common misconception: that spending $5,000 on an AR-15 will automatically make someone a better shooter. He explains that high-end rifles and accessories cannot replace the need for disciplined practice and solid fundamentals. The Radical Firearms RF15 budget setup shown earlier is used as a practical example that capable performance is possible without premium price tags. The emphasis shifts to maximizing personal potential rather than chasing equipment upgrades. Viewers are reminded that performance is earned through repetitions, understanding concepts like height over bore, and running structured drills such as ready-ups and Mozambique strings. The instructor’s tone is realistic and slightly corrective, pushing back against gear obsession and redirecting attention toward skill-building. The message is that money can buy hardware, but only focused training can produce consistent, confident results on target.
The instructor then narrows the focus to the core fundamentals that truly drive AR-15 performance: stance, grip, and overall setup. He stresses that before chasing advanced drills or speed, shooters must get their body position correct. A stable, athletic stance allows better recoil control and faster follow-up shots. Proper grip on the rifle, including how the support hand interfaces with the Unity foregrip and how the firing hand manages the pistol grip, is highlighted as a foundation for consistency. Stock placement and cheek weld are again underscored as critical to seeing the North Tac Ronin red dot the same way every time. The speaker encourages viewers to spend time simply mounting the rifle, adjusting their hold, and ensuring the gun fits them correctly. This segment frames fundamentals as the gateway to maximizing potential, making every subsequent drill more effective and efficient.
The closing portion of the video takes on a distinctly motivational tone. The instructor repeatedly reminds the viewer—addressed informally as “Chief”—that everyone has to start somewhere. He reinforces that the starting point is not a perfect rifle or flawless performance, but a willingness to begin with the basics covered: stance, grip, setup, and simple drills like ready-ups and controlled strings to the A-zone and head. The phrase that sounds like “Stars here” is used as a cue for the baseline or first step in the training progression. Even if performance is rough at first, the message is that consistent practice from this foundation will lead to improvement. The repetition of this encouragement is intentional, aiming to break down hesitation or intimidation for new shooters. The video ends by anchoring the idea that progress with an AR-15 is a journey that begins with fundamental work, not expensive gear.